Special Rate
EXPRESS at €6.90 in France
EXPRESS at €6.90 in France
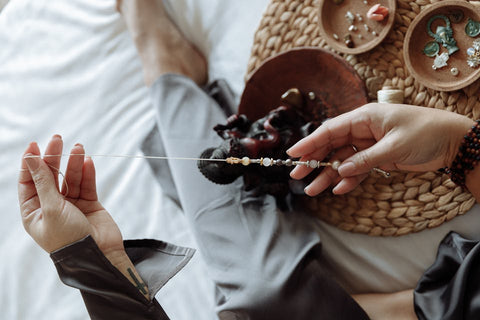
Essential accessories , elastic threads are practical, useful, and inexpensive materials. But did you know that the quality of these threads can make all the difference? That's why we're excited to share our complete guide to using elastic threads for creatives . Discover the different types of thread — nylon, silicone, or multi-strand —and their respective benefits. Every detail counts when creating jewelry . Learn how to choose the right bead sizes , knotting techniques , and finishing tips to achieve a professional finish. But that's just a taste! We've got a detailed tutorial for making your own beaded bracelet on elastic thread. And for inspiration, we've also got some DIY creation ideas waiting for you.
Indeed, " elastic " also means " stretchable " and " elastic ." You must therefore be careful with the weight of beads that are too heavy, which could damage the thread. The latter could then lose its elasticity and the result you had initially imagined would be completely ruined.
To avoid this possibility, it is essential to choose the right elastic thread for each creative project . The key is to select a thread thickness that matches the weight and diameter of the beads you are using.
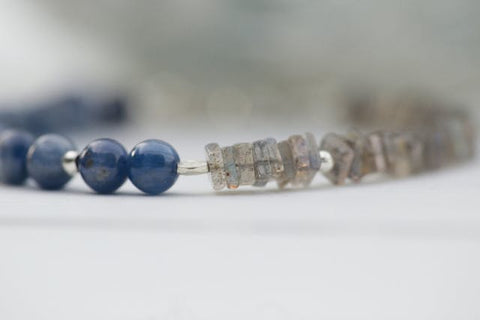
Generally speaking, choose thicker strands (0.8 to 1 mm) for heavy beads like amber, gemstones, or wood. For lightweight beads like glass or seed beads, a thin 0.5 to 0.7 mm wire will do the trick. For example, to create a natural stone bracelet, you can imagine:
Although slightly stretchy at first, elastic nylon threads quickly relax to maintain a perfect fit. A must-have for DIY jewelry, they are strong, flexible, and durable.
Additionally, their elasticity makes them very malleable and pleasant to handle. In addition, nylon threads do not slip and allow for extremely strong knots. Although discreet, elastic nylon thread comes in a variety of shades: black, white, or even transparent, which is almost invisible.
Silicone thread is often stronger than nylon, although this can vary depending on the brand.
This transparent single-strand offers incredible flexibility and elasticity. These two major assets prove to be very practical in all jewelry creations. Ultra-resistant to wear, the elastic silicone thread stands the test of time, if properly maintained. Furthermore, it proves to be extremely manageable.
On the other hand, its smooth and shiny surface makes it naturally slippery , which can be a slight disadvantage for holding knots, compared to a rougher thread. In this case, as we will see later in this article, it is recommended to put a thin dot of glue on the knot after tightening it well.
As the name suggests, multi-strand yarn is made up of several interwoven elastic strands. It has several advantages:
You have 3 options:
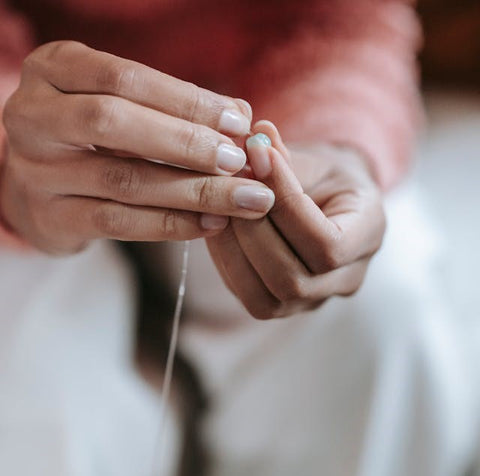
When working with wire for your jewelry projects, it's essential to master the art of strong knots . These knots should be tight enough to prevent the wire from slipping, but not so tight that they damage the material. Here are some techniques to know:
Using a double thread, thread one strand through the loop. Tie a first knot in one direction, then tighten. Tie a second knot in the other direction. For added strength, apply a dab of glue to secure the knot.
Tie a first knot. Keeping the jewelry taut by holding it with your fingers, tie a second knot identical to the first. Be sure to pass the thread through the loop a second time before tightening it . Check that the knot holds well. Also add a drop of glue to secure it.
This knot is very interesting because it tightens as you pull on it. Pass the right thread around the left thread, then a second time. The right thread goes over the left thread and tighten. Repeat the same operation over this first row, making sure to make two loops (instead of one). Tighten over the first row. You can also make a third surgeon's knot to consolidate the whole thing.
At the end of your creation, instead of tying a knot, it is quite possible to use a crimp bead. Here is the technique:
Carefully thread a crimp bead onto one end of the elastic cord, making sure to position it correctly. Then insert the other end of the cord inside the bead, ensuring that the two strands are parallel without overlapping. Gently pull on both ends to adjust the crimp bead snugly. Then, using flat-nose pliers, apply pressure to flatten the crimp bead. This will secure it in place. If there are any excess elastic cords, trim them cleanly for a clean finish.
Elastic threads can stretch and degrade over time, so it's important to care for them properly to extend their lifespan. That's why we recommend choosing quality threads, such as Beadalon Elasticity Nylon Elastic Thread .
Did you know? When working with elastic threads, it's important to consider the tension and stretch of the material. Elastic threads can stretch up to twice their original length, so it's important to find the right balance between tension and stretch. Tip : Before you start stringing beads, pre-stretch the elastic thread. This will allow the jewelry to relax right after it's made. This will help it retain its shape and elasticity.
Whether it's bracelets, necklaces, or DIY accessories, your creations will be cherished for many years to come.
Here are the points to consider before purchasing:
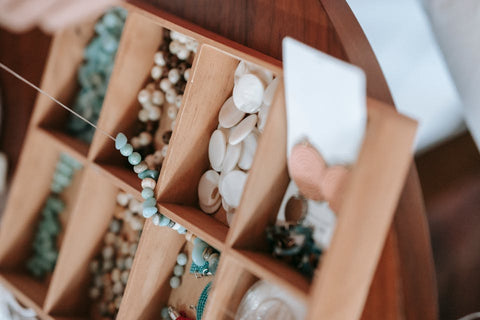
At I-Perles , we are here to assist you throughout your elastic jewelry creation project. We offer a wide range of elastic thread, ranging from 0.5 mm to 1 mm in diameter, available with or without a spool . This way, you can choose the ideal thickness depending on the weight and size of your beads.
Visit our dedicated page if you would like more detailed information on buying the best elastic thread for your beaded creations .